To Record with VLC Windows
Open VLC Player
Set the recording location
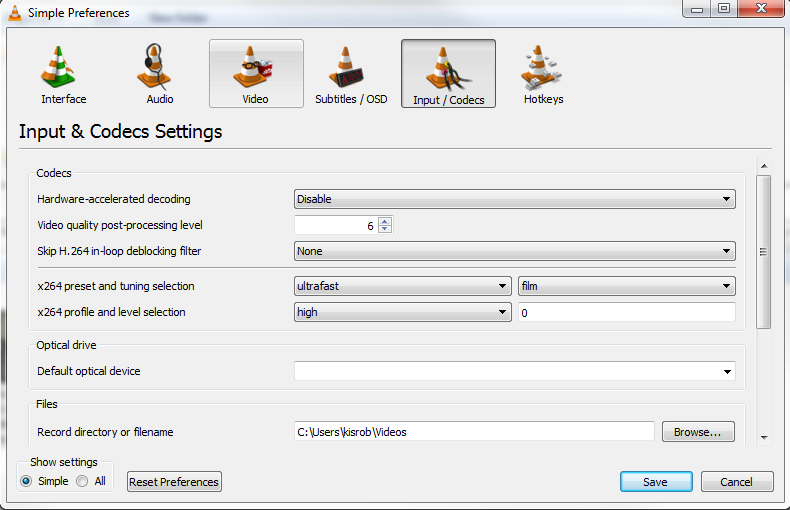
In VLC select Preferences from the Tools menu
In the Preferences Window, select the Input/Codecs tab. Use the Files > Record directory or filename field and click Browse to find a location to store/record your saved video files. C:\Users\username\Videos or another folder on your drive. (On Bethel systems, seems not to record to Desktop?)
Click the Save button at the bottom of the Input & Codecs Settings window.
Activate the Record Tool: Select the View menu and select Advanced Controls. This will place the record tools on your VLC player window.
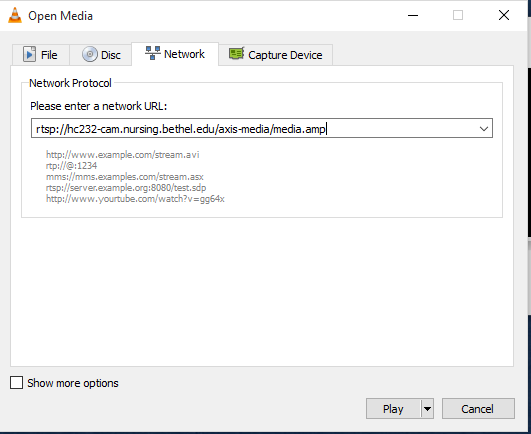
Access your Network Stream
Select the Media menu and select Open Network Stream
Enter the address of the network stream in the Please enter a network URL field and click on the Play button in the Open Media window. Note that an authentication box may pop up if access to a network stream is restricted.
Record
In the VLC player window click on the red Record button, which will turn blue to signify that recording is enabled.
Press the Record button again to stop recording. Recordings are stored in the folder you set in step 2 above.


To Record with VLC (Mac)
File/Media > Open Network
Paste in URL for Multimedia Stream from above
Check Streaming/Saving
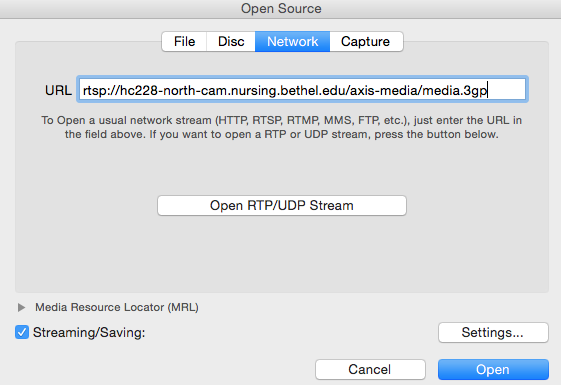
Click Settings
Check Display the stream locally
Check File and browse to where you want to save the file
Encapsulation method set to MPEG 4
Click Okay

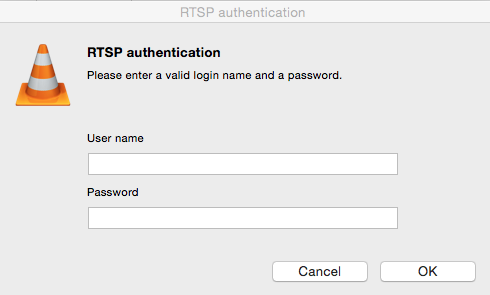
Click Open to start, enter username and password for the camera and click okay
Click the stop button to stop recording.